Pages

Monday 9 September 2013

Cute baby aprons

Hello,

Today I would like to share with you my small but incredibly cute baby apron collection which I have been making over the passed few months.
They are made of cotton fabrics- both solid colours and with prints as well as lace.


And here are some photographs from one of my customers, this beautiful baby girl is wearing one of my aprons. Doesn't she look just adorable?! 
Thank you so much for the pictures Dave and Anna!


The actual sewing pattern was designed by http://snazziedrawers.com/
I sew them myself at home and you can purchase them HERE

Aren't they sweet??
I think the last one is my favourite which one do you prefer?

Gosia

xxx

Saturday 31 August 2013

Pink And Turquoise Flamingos 50s Tie Front Shirt

Hello hello!

Today was a great day for me for two reasons.
Firstly I finally got to go on a test ride on my new (second hand) bike. And it was a beautiful ride along the canal and then up towards the hills. Oh I'm so happy with the bike!!
Secondly I was wearing my newly sewn flamingo shirt which I love even more than my new bike!^_^
The sad news is that the summer is leaving us now, autumn definitely was felt is in the air...

Anyway weather aside here it is:
My pink and turquoise flamingos 50s tie front shirt!


Freshly screen printed flamingos:


What do you think? Aren't the flamingos sweet?^_^


Gosia

xx

Sunday 25 August 2013

Hand printing and fashion- 50s Tie Front Shirt

Hello,

I was doing some design and pattern cutting last week and came up with this vintage inspired- 50s tie front shirt with sea side inspired hand printed design on it.

It's such a comfortable slightly loose cut, it's perfect for warm summer days.
Looks great with jeans and shorts and skirts too!

My hand carved boat stamp


I love this design so much that I am going to make more shirts!^_^
The next one I have in mind is in blue colour with pink flamingo prints, let's see how that goes...


Gosia


xxx

Throw Pillow Cover- TUTORIAL

Hello,

I had this beautiful Laura Ashely fabric lying around for some time and while I loved its beautiful print so much I wasn't sure what to make from it.
Until one day I realised just how ugly my old cushions were, lying there on the sofa served no decorating purpose whatsoever! It was time for a simple makeover!^_^


Cushion cover tutorial:

This is a very easy tutorial with an envelope closure.
My pillow inserts measure 15'' x 15 '', pillow covers should always be slightly smaller than the insert, this keeps the covers taut.
I am making mine 14'' x 14'' and that is going to be the front. Back will consists from 2 pieces.

Measurements:
(including seam allowance of 0.8'' for the sides and 1.2'' for back hems)

Front- 15.7'' x 15.7''
Back *A-  15.7'' x 13''   and *B 15.7'' x 9.5''


Iron fabrics, double fold back hems (1.2''), press and stitch along as seen in the picture.


Now pin all the pieces together with back hems overlapping as seen in the picture:


Stitch all around. Now if you have an overlocker you can overlock the endges, you can also zigzag stitch them.

overlocked edges


Or fold the excess seam in neatly, like this:


 Press and stitch closer to the outer edge making sure to sew all the layers of the fabric. 


And this is the inside of your cover! Hurray!^_^


And here is the cover, back view.


I made three cushion covers in the same fabric and since I had just enough Clarke & Clarke stripe fabric I also made a small cover for a long cushion .


Oh how beautiful! 


And wasn't that an easy sewing project? ^_^


Gosia

xxx

Thursday 15 August 2013

Retro prints for the brave ones^_^

Something a lot different than butterflies, something not so sweet but rather daring..
Using rubber stamps of geometric shapes and textile inks in strong, bold colours I have created this retro cushions:

I have to say the job was a very messy and time consuming one. Nevertheless very enjoyable and fun!^_^

The heart for example is made up a lots of triangles, stamped one by one.
Once the first colour was applied I had to wash and dry the stamp in order progress to the next colour, then back again to the first colour.

This design was more thought through:

This item can be purchased HERE


This one however was more unplanned, random, see- what- comes- out- of- it kind.
I have to say it is my favourite^_^

This item can be purchased HERE


And what are your thoughts? I would love to hear your opinions.

Malgosia

xxx


What has become of my butterfly prints

Remember my post with those lovely butterfly stamps?

 I finally made a good use of those fabric swatches! I then took my rubber stamp out again to stamp some more and more..

That's my rubber stamp


 I ended up coming up with a small butterfly collection.
 Home ornaments...

This lovely pillow can be purchased HERE

This one has hand embroidered details added: 


Hear ornaments in red and blue:


How sweet my room looks now!^_^


 And when tea time comes I get to place my mug on one of these lovely coasters!^_^
This sweet coaster can be purchased HERE


This heart ornament can be purchased HERE


This lovely pillow can be purchased HERE


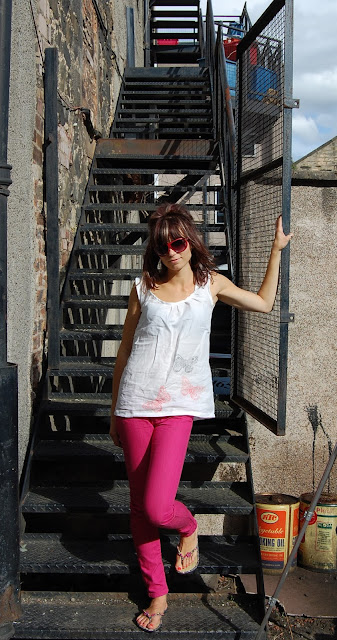
.. And of course I didn't just stop there, there was some fashion too- a lovely linen blouse:


Fading effect..


And what do you think of my small collections? I have to say I am quite pleased with it!^_^

Gosia
xxx